How can I replace part of audio clip with another audio clip?
What is the easiest way to replace a small portion of audio in a video?
Run into an audio mistake in your project? You're not alone! Audio errors happen all the time—whether it's a mispronounced word, background noise, or a section that just doesn't sound right. The good news? You don't have to start over.
In this guide, you'll learn how to replace part of an audio clip in both standalone audio files and video projects, so you can fix mistakes fast and keep your edits seamless and professional. Let's dive in!
Part 1: How to Replace an Audio Section in an Audio File
If you're trying to replace an audio section in a standalone audio file, it's the simplest scenario since you're only dealing with sound—no visuals to worry about.
The common way to replace parts of an audio track is to split the original at specific points, remove the unwanted section, and insert the new audio into the gap. This method works well in tools like Audacity or online audio editors such as FlexClip.
However, there's an even easier option. Instead of manually splitting and cutting, you can use FlexClip's AI-powered, text-based editor to automatically remove any section of audio in just a few clicks, and then replace it with your new audio via its built-in editor — making the process faster and more efficient.
Note: This method is best suited for editing spoken content or dialogue. If you're working with non-speech audio, such as music or sound effects, a manual split-and-cut approach is usually the better option.
Now, let's check the detailed steps below:

Step 1 Access FlexClip's Text-Based Editor
Click the Replace Part of Audio button above to access FlexClip's text-based editor, then upload the audio file you'd like to replace an audio section from. This tool can helps you convert your audio file to an editable transcript and automatically edit it by editing text. Pretty easy!
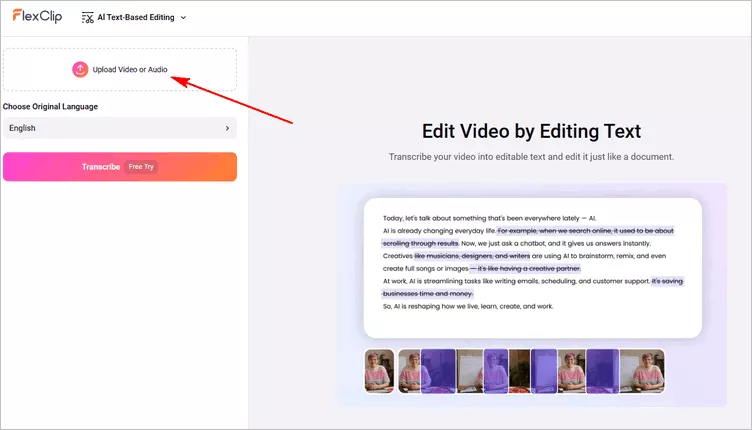
Replace an Audio Section in an Audio File - Access FlexClip's Text-Based Editor
Step 2 Cut the Unwanted Audio Clip with AI
Once uploaded, click the Transcribe button to start transcribing the spoken content into editable text. After a few seconds, you'll get a transcript of of audio, and you can manually delete any text content to cut and remove any part of your audio. Here, you can also try its search feature to find any unwanted information, such as filler words for a quick removal.
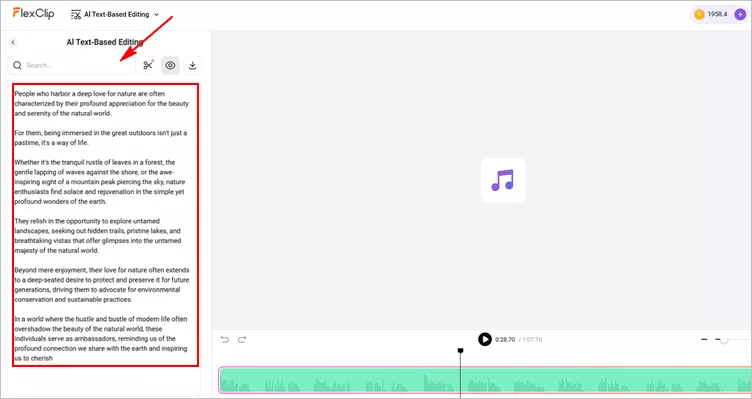
Replace an Audio Section in an Audio File - Transcribe and Cut with AI
Now, you've got all the unwanted parts removed from your audio track, it's time to add it to FlexClip's built-in editor for inserting your new audio. Just click the Edit button then select the Splitted Clips option to take your audio clips into the editor.
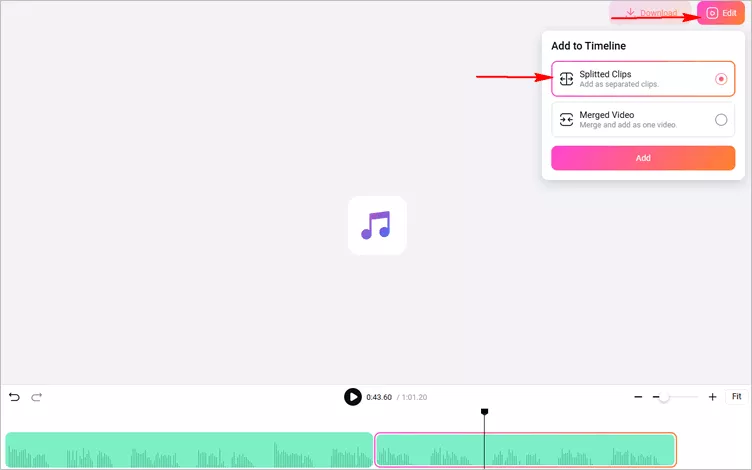
Replace an Audio Section in an Audio File - Add the Trimmed Audio to Editor for Inserting New Audio
Step 3 Add or Generate New Audio
When you're in FlexClip editor, upload and inset your new audio between the audio gap directly. Or you can try FlexClip's Speech tool to generate new audio with AI. Here's a voice cloning tool for you to clone the original audio voice easily and generate consistent custom speech for your audio.
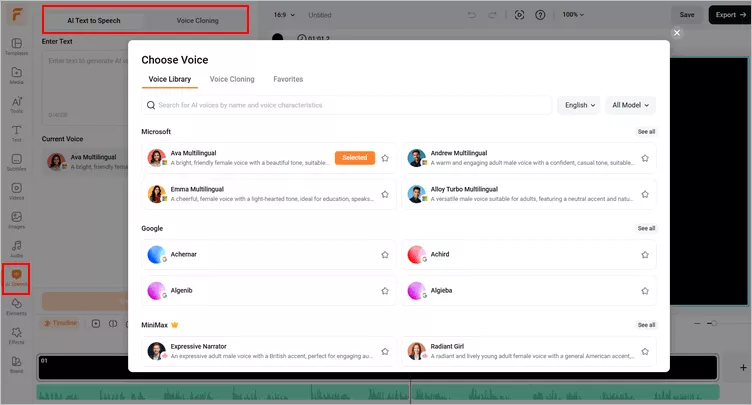
Replace an Audio Section in an Audio File - Add or Generate New Audio
Well, you've got your new audio ready, add it to the timeline, and drag the slider to position it immediately after the first clip of the original audio. Then, move the second original clip to follow the newly inserted audio. Here, you can use use the audio editing tool to adjust the volume and more, add fade in/out effect to make a smooth transition for avoiding abrupt arrival or end of sound effects, if needed.
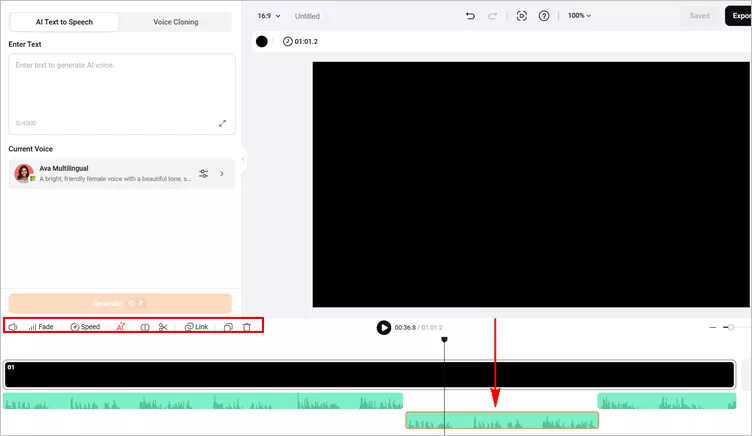
Replace an Audio Section in an Audio File - Insert and Edit New Audio
Step 4 Export Your New Audio Track
When it's OK, you can preview the whole audio with the replaced section, if satisfied, just click the Export button and select the Audio option to locally save your new audio track. If not, you can continue editing your audio track using FlexClip's powerful editing features.
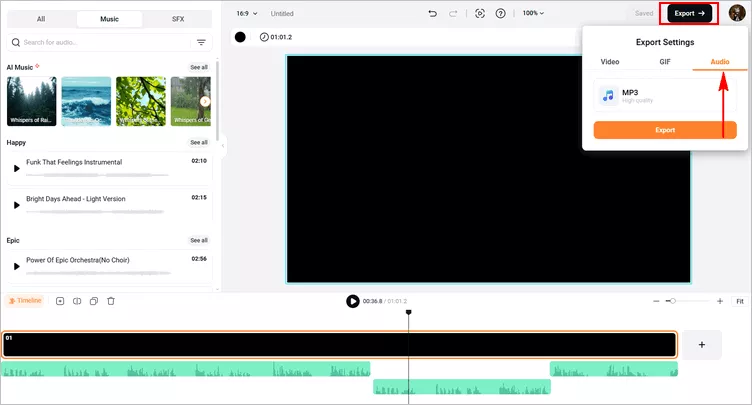
Replace an Audio Section in an Audio File - Export Your New Audio
Part 2: How to Replace Part of Audio in a Video (Keep the Visuals Intact)
When you're working on a video project and need to replace part of the audio, the process can feel a bit more complex since you have to update the sound while keeping the visuals perfectly intact. In this case, you'll first need to detach the audio, edit the audio track separately (using the AI solution introduced above or trying a manual split-and-cut approach), and then bring everything back together—adding the new audio and syncing it with the video.
It might sound complicated at first, but don't worry—we'll walk you through the entire process step by step.
Step 1 Upload Your Video File to FlexClip
Head to the FlexClip editing page, and go to the Media tab to upload your video files from your PC, phone, Google Drive, One Drive or Dropbox, and then add your video to the timeline.
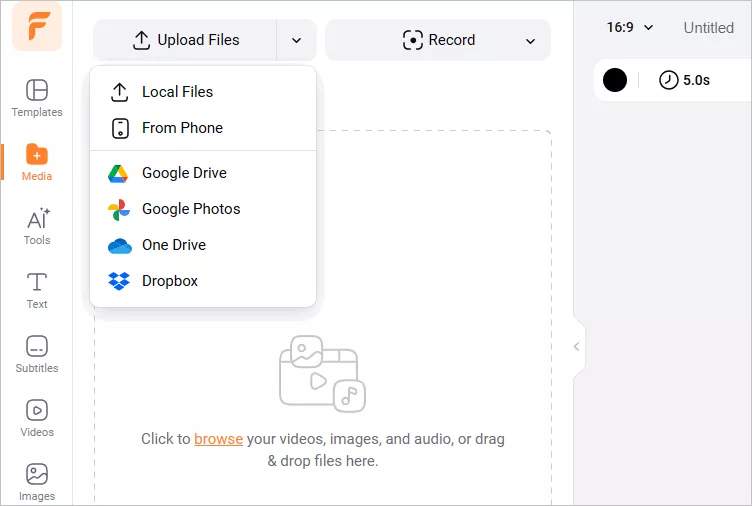
Replace an Audio Section in a Video - Upload
Step 2 Detach the Audio from Your Video
To replace part of audio in a video, we need to extract the audio first to keep the video intact.
Right-click on the video on the timeline, and select Detach Audio option, then FlexClip will automatically extract the audio from the video for a separate audio track, which you can replace any audio section while keep the video.
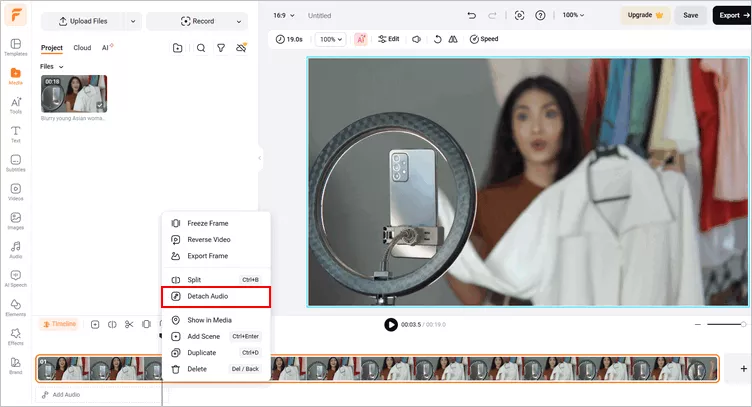
Replace an Audio Section in a Video - Detach the Audio
Step 3 Replace Part of Audio
Now, you've had the separate audio track ready for edit. You can try FlexClip's Text-based editor to trim the audio with AI, and insert the new audio as we do above. Or try its easy splitter and trimmer to cut any part of audio manually, and then replace it with a new audio clip.
To cut out a specific section that you want to replace in the audio track, just move the playhead to its start on the timeline and click on the Split icon, then do the same at the endpoint. And finally select this section on the timeline and click Delete to remove it.
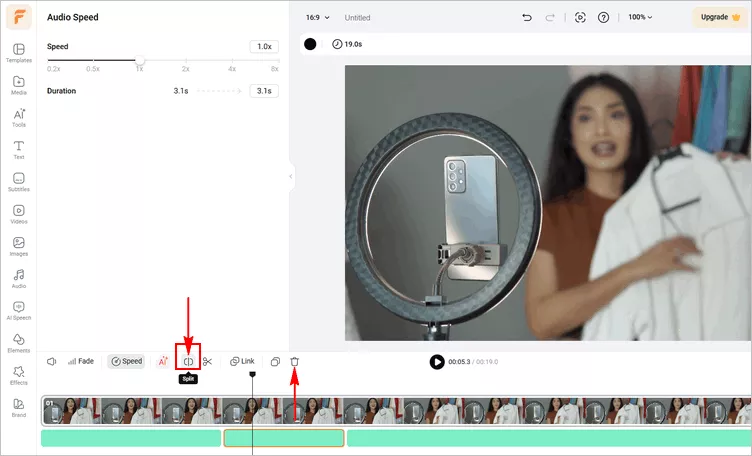
Replace an Audio Section in a Video - Cut Unwanted Audio Section Manually
After that, you can add your new audio clip to replace the trimmed one directly. Or you can make more edits to sync your video and audio.
Step 4 Download and Share Video with Replaced Audio Section
Once you have finished editing your audio and video, you can preview the whole video to ensure your changes look and sound as intended. Once you are satisfied, click on the Export button to save your video with replaced audio section. Here, you can also seamlessly share the edited video with others via a link, or post to social media, like YouTube or TikTok.
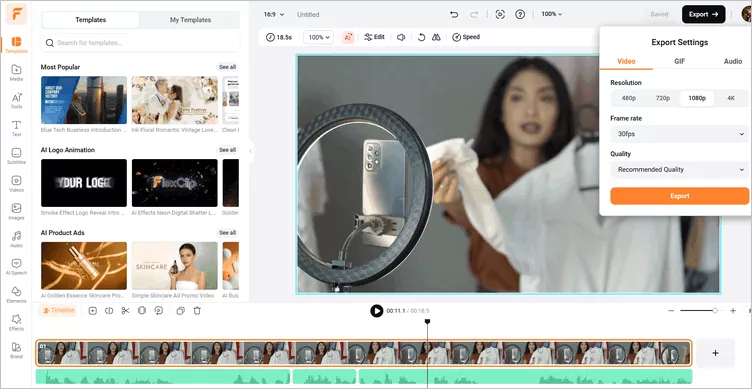
Replace an Audio Section in a Video - Download
Final Words
Replacing part of audio is a powerful technique that can save hours of re-recording, and it doesn't have to be complicated or time-consuming. Whether you're editing a standalone audio file or working within a video project, using the methods we shared in this blog you can easily fix mistakes, improve sound quality, and update your content without re-recording everything from scratch.


FlexClip AI Video Maker
Reach professional-quality videos faster with easy editing tools, templates, and smart AI.
Start Now for Free
Hot & Trending
-

Best Ways to Find Music in YouTube Videos
-

Instagram Story Video Quality Bad After Upload? Fix It!
-

How to Repost Video on TikTok & How to Remove TikTok Repost
-

Improve Video Quality Online: 3 AI Video Quality Enhancers You Can't Miss
-

4K Convert to HD 1080p without Watermark: Best 4k Video Converters
-

Top 13 Birthday Video Makers with Music and Effects Free
-

How to Search Filters on TikTok & Use a Filter You See - TikTok Filter Guide
-

Large Collection of Creative and Funny Birthday Video Ideas for Ones You Care